Transforming Plain Steel wheels to 9C1 style:
Welcome to my 9C1 Steel Wheel construction page. On this page I'll be taking a standard 15"x7" Caprice steel wheel and adding a center cap similar to the 9C1 Police package. I'll also be adding chrome rings and chrome lug nuts, but that's for a later date.
Circumstances occurred this spring that prevented me from purchasing Impala SS rims for my 1994 DCM Chevy Caprice Classic Wagon. Because of a pending deadline to remove the studded tires from my car and the lack of an aftermarket that is both cheap and stylish, I decided to dress up my steel wheels on the cheap and wait a season or two before I go with the 17" Impala SS rims.
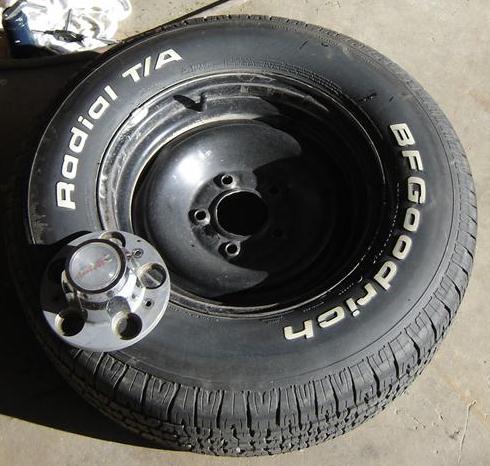
Below we start with a standard wheel, and one of my 4 center caps. Look around on eBay and you can score a set cheap. These four cost me $18.00 shipped, but didn't come with bolts and are actually for a GMC truck...we'll fix that later. I decided on raised white letter tires a long time ago, I guess I'm just a sucker for them.
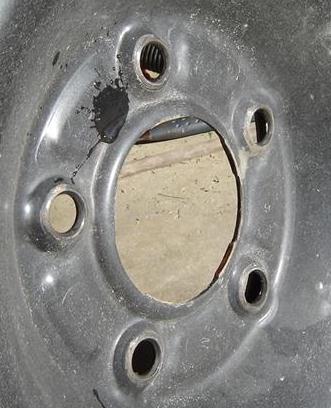
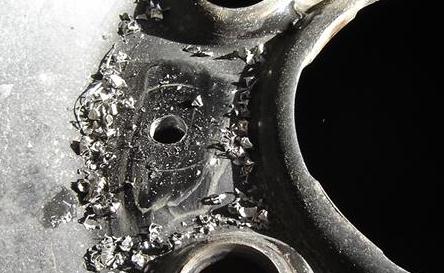
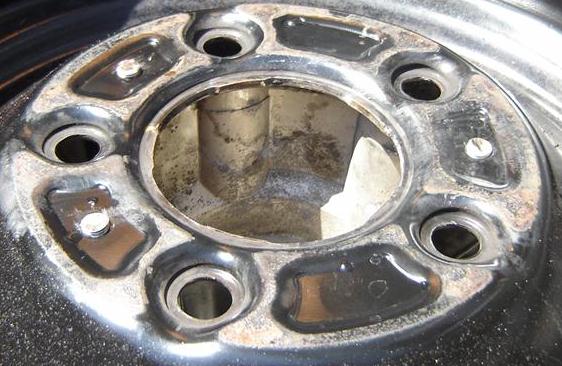
Now, 9C1 wheels are found on police package cars and if I recall correctly were used because regular cop cars tended to pop off hub caps and they needed a wheel with more ventilation. True 9C1 wheels had three treaded holes for bolts to secure a center cap (the bolts kept the centers from flying off), and vent holes all the way around the rim. We can't repeat those vent holes, but we can copy the caps. Our first problem: No threaded bolt holes...you can see raised sections on the wheel below, but we'll need to drill and thread some holes.
First step is to mark the correct spot for the holes. This is a very important step. Taking just an extra minute here can save you pain later. Place the cap on the wheel, it should rest down and not move as it is designed to fit around the lug nut holes. Take an awl and place it dead center in one of the three bolt holes and hit it with a hammer...repeat this for all three holes. Check and make sure the awl marks look center, otherwise strike it again and get it right.
To save some picture space, take your awl marks and drill a pilot hole...I like little 1/8" bits as they are cheap and work well. The next size depends on the type of thread you plan to use on your wheel. We'll be using a 5/16" bolt and you can use either a course (18 treads per inch) or fine (24 treads per inch). I couldn't find my 5/16"x18 course tread tap, so I had to go with 5/16"x24 fine tread. As per what is written on the tap, I'll need to drill a 17/64" hole. In a super rare event, first drill bit I pulled from the tool box was this size...no kidding! With the correct size, I now drill my holes.
This would be a good time to check the alignment of the holes with your cap. If anything is way out of alignment, it would be best to rotate the cap and try again. You can handle some misalignment, but the bolts fit pretty tight in the cap and they don't provide much room for error. If everything looks good, thread the hole with your tap...I'm not going to get into how to tap a hole, if you don't know, now is not a time to learn. Best to grab someone who knows how and then proceed.
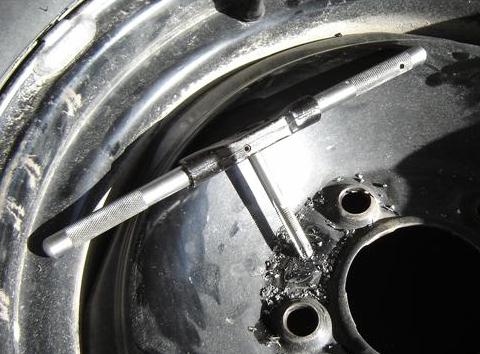
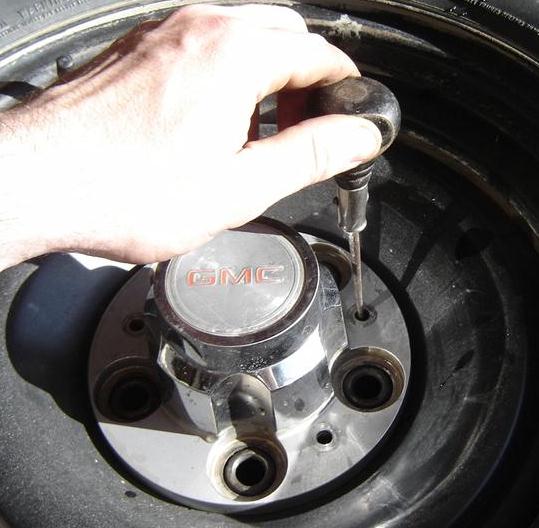
Once all the holes are treaded, time for a test fit. Place the cap, thread the bolts and everything should work pretty well. Next is to clean up the wheel by clearing out the metal scraps and bevel the holes with a reamer. I washed my wheels and waxed them so they look real nice behind the caps.

I used 5/16" fine threaded bolts that were 1" long. I purchased 15 (three extra) stainless steel bolts for about $2.50. One downside was I couldn't find a flanged bolt similar to stock. A flanged bolt looks like it has a built in washer. If I eventually find a nice flanged bolt, I'll install them later. The ones I purchased just look like hex bolt sticking out.
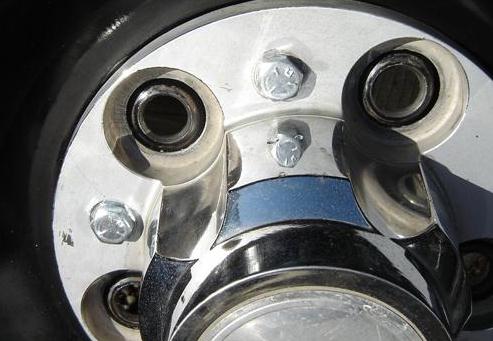
If I were doing this project over again, I would purchase 3/4" long bolts instead of the 1" bolts. Because you need to make sure the bolt is flush with the wheel, I ended up cutting quite a bit of the extra bolt off. You need to do this to make sure the wheel sits properly against the hub. If any part of the bolt sticks out, the wheel won't mount straight on the hub and it will wobble. After tightening the bolts, run something flat over the back of the wheel to make sure nothing is sticking out. I ended up cutting my bolts and if anything was left over, I used a grinder to get it flush.
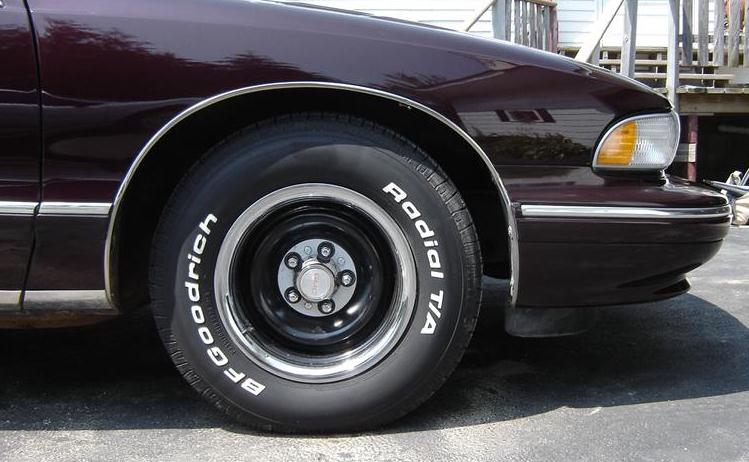
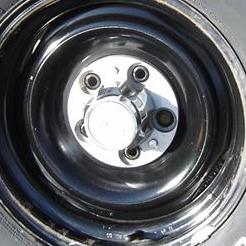
Below is the finished product...nice clean wheel on a dirty car. A non-9C1 feature would be a nice trim ring, which I'll pick up in a few days. Something around 1 to 1.5 inches looks nice, your choice of material. I've also got some chrome lug nuts, 20 for $21.00 shipped, another ebay score. With that, I'll have a nice set of summer wheels for the time being, and in a year or two, I'll use the caps and rims on my winter wheels while my Wagon rides on Impala SS rims!

Thanks for reading this article. If you found this article helpful, drop me a note as it helps me write other articles at TheReflex1@aol.com. To view some additional Caprice articles click on these links: (Cornering Lamps) (Raised White Letter Tires) (Intake Mods). I'd also like to note that the ImpalaSSforum has been a great help in general information and can be reached at www.impalassforum.com.
UPDATE!!!
Below are the finished wheels. We have $21 in GMC caps (eBay) and bolts (local), $21 in Chrome lug nuts (eBay again), $42 in trim rings (local), Grand Total per wheel: $21!!! Not bad for a factory wheel meant to be covered by a hubcap.