Gilson Snowblower Fan Modification!
Let me introduce the equipment: I received a 1984 Gilson 22" 5 horsepower snowblower from a friend of mine for free. It's a pretty nice machine, it needed some adjustments to the carburetor, a little cleaning, but overall the engine ran great. Then it snowed and I tried it out...
In a word...awful. It threw snow all of 3 feet at best. It was light weight and cheaply built machine, but no way would have someone paid good money for this machine new and have it throw like this...something must be wrong. I did change the belt, but it was still horrible...then I read on the internet about a kit that actually attached to fan that sealed the gap between the fan and the fan housing. Well, I'm cheap, but he included pictures, so I figured I'd make the kit myself. WOW! WHAT A DIFFERENCE! It turned this machine from a dog to an amazing snowblower! She's throwing a good 20 to 25 feet instead of 3!
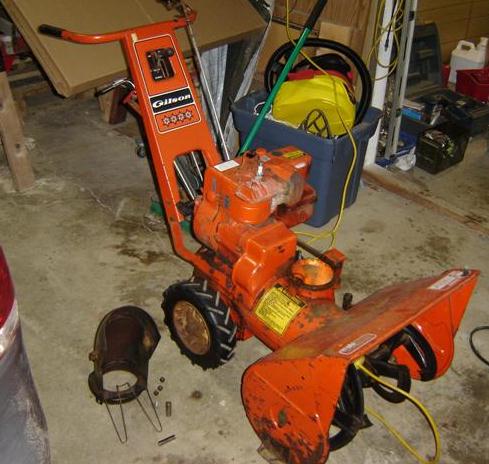
Below is our test subject...notice I've removed the chute mechanism to allow for easier access to the fan. Yes, she's got a bit of rust here and there, but ultimately is quite runable. It is a 2 speed...one speed forward, one speed reverse. I've disconnected the spark plug for safety.
I am working on the fan...this is the item right behind the auger that takes the snow and throws it, hopefully far away. This unit has three fan blades...I have seen other snowblowers with four.
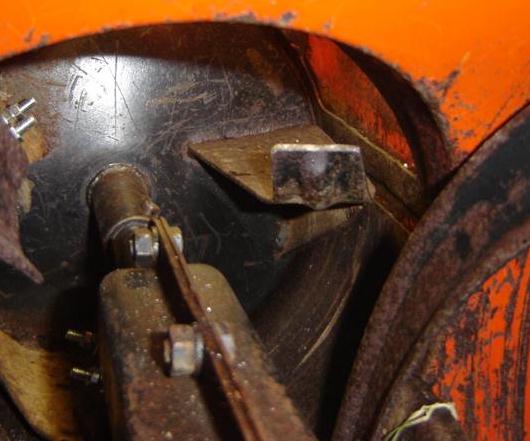
The problem is the gap between the fan and the fan casing (or outer shell). If this gap is too large, it really hurts efficiency of the snowblower. Tightening up this gap creates a better seal and allows the unit to throw further, especially when working in slush. In my case, this unit has quite a large gap...something that can definitely be improved upon. The below gap ranges from 1/4 inch up to about 3/4 inch at the tip. It is a design compromise between having the machine throw snow well and the duriblity of the unit over time.

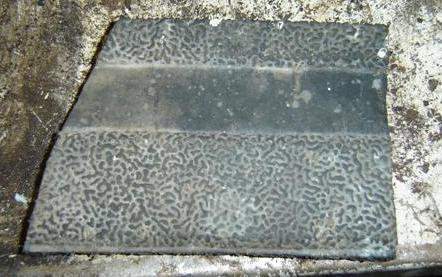
This is where the modification comes into play. As seen on the internet, you can take strip of hard rubber, bolt it to the blade and fill the gap. These rubber strips were about 4" long and included a metal bracket to hold down the rubber. Below is my rubber, this is actually part of a truck bedliner mat. I've been using this as a floor mat in front of my bench, but it is really heavy duty rubber. I have used it in a varitey of projects and cut pieces off when I need them.
Below is a cut piece. I actually cut a 15 inch strip that is about 3 inches wide. I took this piece and contoured it to fit the fan blade.
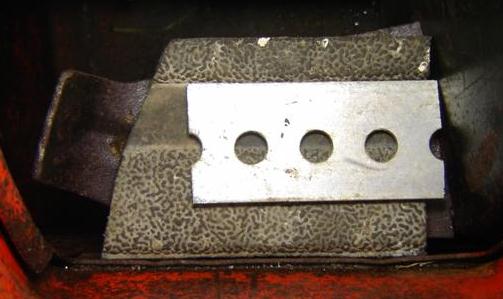
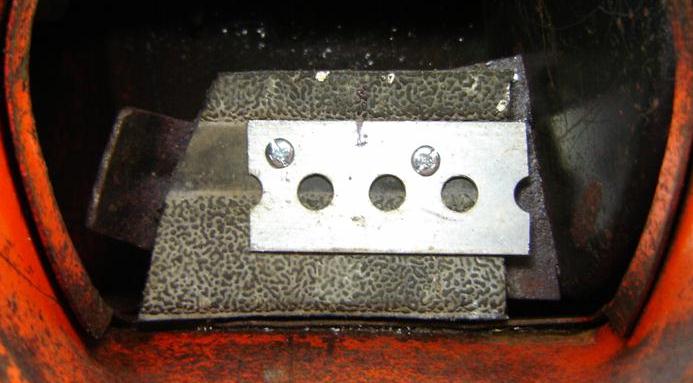
Below is the rubber strip sitting on the fan. I probably could have done better on the right side of rubber, but not knowing if this would work at all, it didn't seem like a problem.

Next is the metal bracket to hold down the rubber. I had thought about just bolting the rubber to the fan, but long term the rubber would have just ripped or torn. This metal bracket provides much more support. I selected this bar stock because it was the smallest I had...I would have no problem going about a 1/2 inch shorter.
What you can't see above, but you can below, are my drill hole marks...a compromise between location on the bar stock and on the fan blade. The middle mark was just so I could keep the rubber in line with the bar stock.
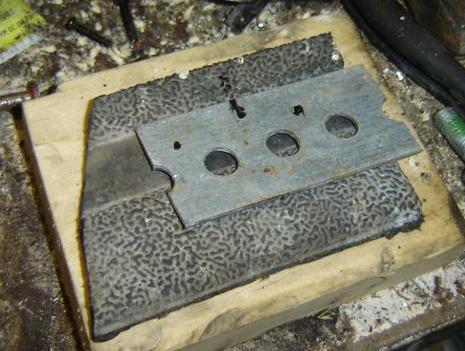
Below is the assembly...I've drilled my holes and inserted my machine screws. You'll note there is a ridge on the strip that was on the orginal mat. It works out that the bar stock digs into this ridge and helps keep the strip in place.
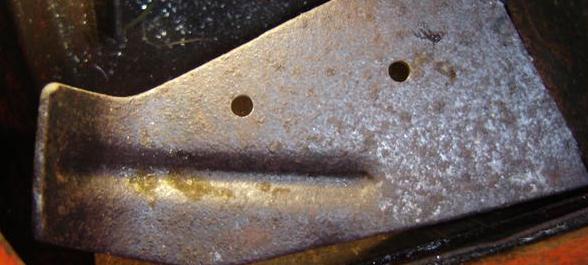
Now, my piece is on the fan blade, I've pulled out the machine screws and use the drill with a 1/8" bit to just mark the blade. I'll then remove the piece and drill my holes. This makes sure that this piece fits exactly on the fan blade and seals the gap. Because each of the three fan blades are custom like this, they will not be interchangeable.

There are my holes...I had to work around a bit to make sure I was able to drill on the flat part of the blade.
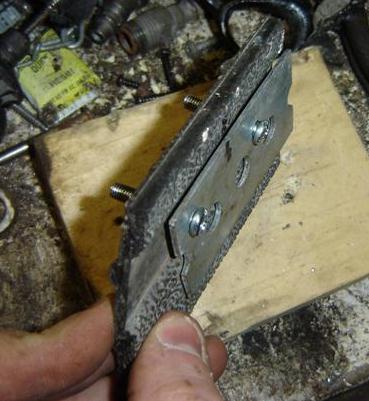
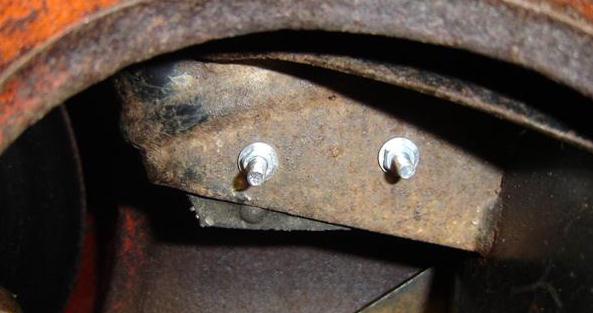
Now I have assembled the unit. I reinstalled the machine screws through the holes in the blade and secured them with washers and nuts. I would have preferred to use a hex head but this is all I had in this size.
This is the back side of the blade. I actually double nutted these screws for now to ensure they won't back off.
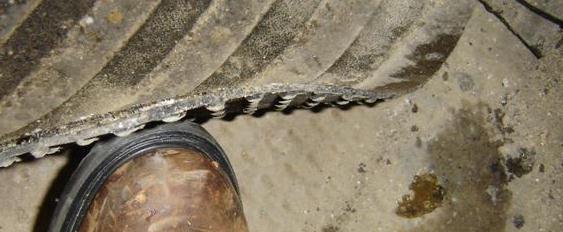
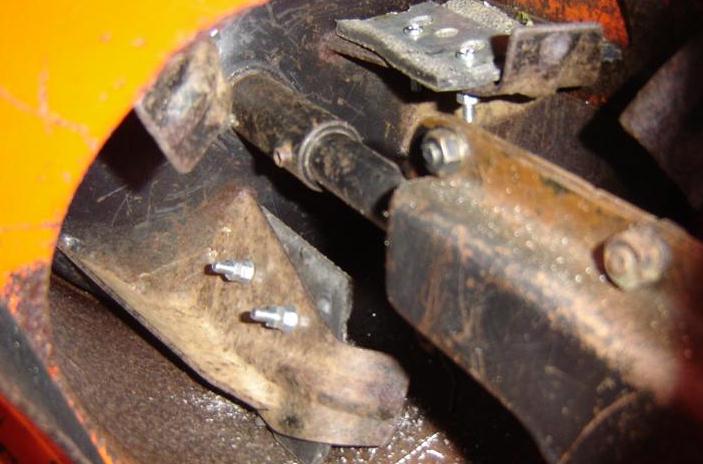
Looking into the fan, you can see all three rubber strips installed. They actually swept up the metal shavings as I turned the fan. Given a little time, they will wear to the casing and make a great fit.
It's February 9th at about 8pm, so I threw some snow on the driveway, fired up my blower, and was amazed. We're expecting a good chunk of snow tomorrow, so I'll post some video of this little 5 HP unit kicking some serious snow!
Back to Gilson Main Page
Feel free to head back to my Tractor Page or visit my main page at http://www.butchthecat.com