Transmission Fluid and Filter Change
This is a picture procedure for those of you wondering what is involved with changing your fluid and filter in your W body car. For those of you linking straight to this page, I'm working on my 1993 Pontiac Grand Prix with 3.4L DOHC and a 4T60-E transmission, very common for W body cars.
First thing you'll need to do is get some parts...a filter, some transmission fluid (6 quarts) and if you so desire, an additive to help if your transmission is getting older. I tend to go to Napa as they have everything I need, but any parts place will do. The filter and the conditioner cost me $26 and the fluid (Havoline Dextron III for me) ran about $12.00 for a grand total of $38.00. The transmission filter comes with a gasket and a seal, but we'll get into that later.
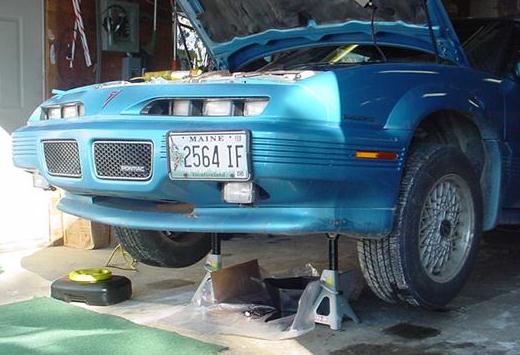
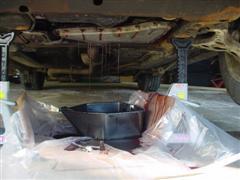
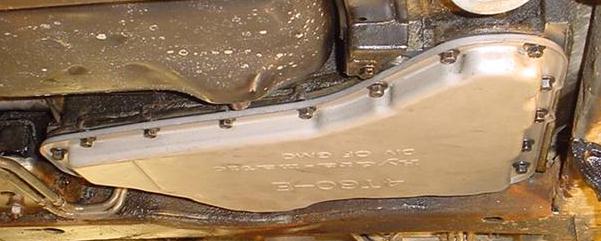
First, elevate your car. I find the easiest way is with jack stands as it allows access and tilting the car allows the fluid to drain out the back. Here the jack stands rest on the engine cradle. I lay the catch pan and a trash bag in between the jack stands under the transmission.
I'm a big fan of plastic trash bags...why? Because you can spill all you want on them, then just roll them up, drain them and throw them away with a clean garage floor left behind. And by the way, you will spill in this next step. We'll be loosening the pan from the transmission. The bolts are 10mm. After locating your catch pan near the rear of the transmission, slightly loosen all the bolts. At this point, you'll start to see them weeping and that's ok. Our goal here is to get the pan to tilt back a little, as to drain on the back side instead of all around (and hopefully, into your catch pan). You do this by loosening the rear bolts more then the front bolts. Now I had this pan off 15,000 miles ago, so it's pretty free from the transmission. You may need to pry yours, just be careful as we're in Aluminum land, and things like to get scratched and leak.
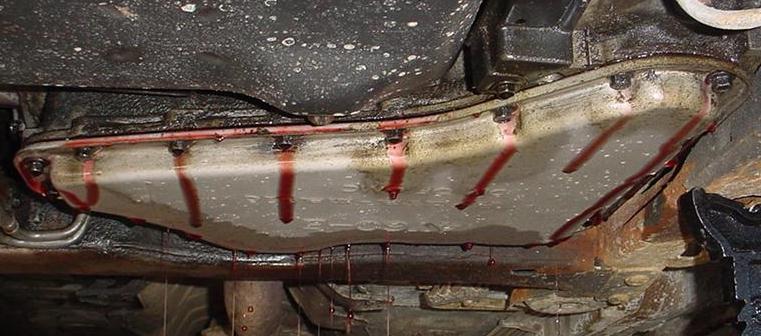
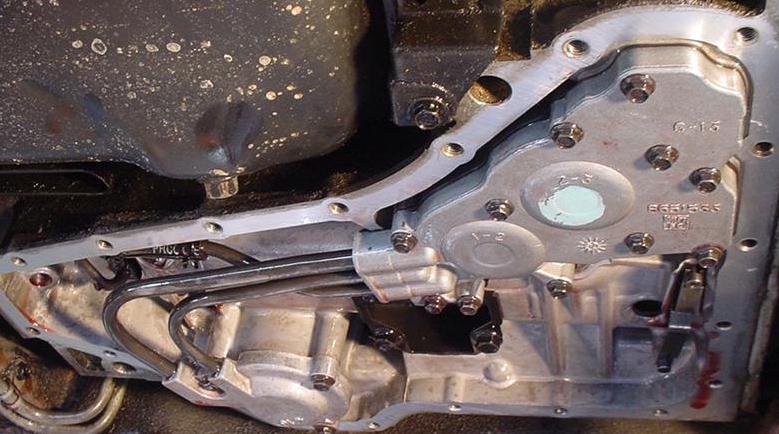
If you've got the time, leave and come back later...just let the pan drip for a while. The fluid level, when full is actually higher then the pan, so if you've got most of the fluid going out the back, just let it go. Once it slows down a bit, keep loosening all the bolts. Start taking them out but leave two on the left and two on the right side to hold up the pan. Finally, remove these four bolts. I do this one at a time and hold the pan up with my free hand. Once they're all out, lower the pan, keeping it level (it's still full of fluid) and set it aside. What you'll see is below.
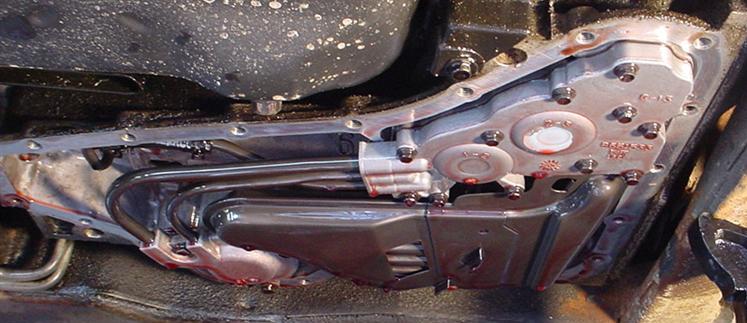
I'm too lazy to draw arrows and stuff on the pictures...so the filter is what isn't in the picture below.
You'll want to pull the old filter straight down. You will need to wiggle it. It is held in place by the the neck of the filter in the seal, so it's a tight fit. Now remember, it's full of fluid, so be sure to do this over your catch pan. Once you drop it, drain it and throw it away. Next we need to deal with the seal that was holding in our filter. This is tight tight tight. The service manual states that if this seal is in good condition, you may leave it and just change the filter. I am glutton for punishment and always put in a new one. I do have one trick up my sleeve though...
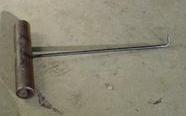
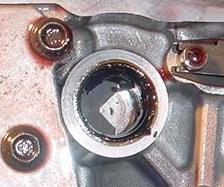
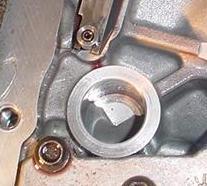
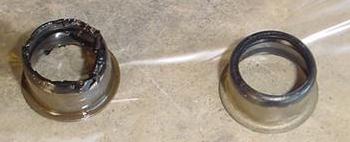
I have a little spring puller. It's very tough and will not bend and is the perfect shape for pulling that little seal. Now, whatever you do LOOK OUT NOT TO SCRATCH THE ALUMINUM. This is the pump intake so we need to keep it as sealed as possible. That being said, if you do scratch it, oh well, keep going, but try not too. Give it a good wipe to make sure it's clean and put the new one in. For reference, I've got the old ripped one next to the new pretty one.
By putting the seal in the transmission, we've begun the install process. I usually have to tap mine in with a piece of wood and a hammer. Once in place and flush or as far as it will go, dig out your new filter and wet the neck of it with transmission fluid. This will help it to fit in the seal without ripping anything. Below is the bottom of a new filter ready to go.
Wiggle that baby up there until she wiggles no more. Actually, you'll run out of space. Be sure to apply upward pressure on the neck area of the filter so it sits well in the seal. If you don't go up far enough, you'll never get the pan back on. That's it. The transmission side of things is done. We need to do some cleaning now. Lets start with the pan...
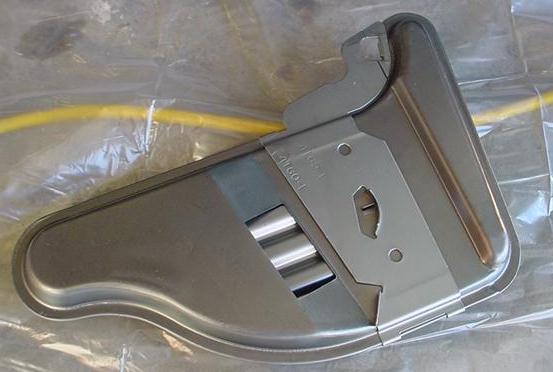
Drain the fluid out of your pan. Now, depending on the last time the filter was changed, you may see a lot of little metal shavings. It shows up like a really fine black sand. Just wipe the little square magnet with your finger, you'll see what I mean. This is actually normal and just part of the process of the transmission doing it's thing. As seen above there isn't much on the bottom of the pan...and that's good. If you've got piles of the stuff it probably means it wasn't cleaned very well last time the filter was changed or your transmission is starting to eat itself. New cars will have lots of shavings as new parts wear in. That being said, this car is doing good as it had a lot of shavings on the first filter change but very few this time. Now that we've looked at them, clean'um up!
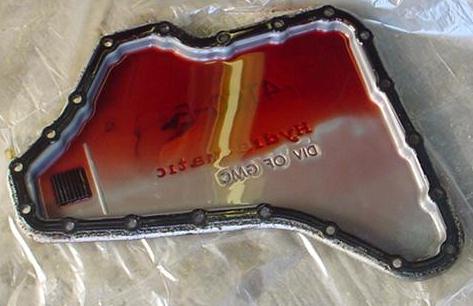
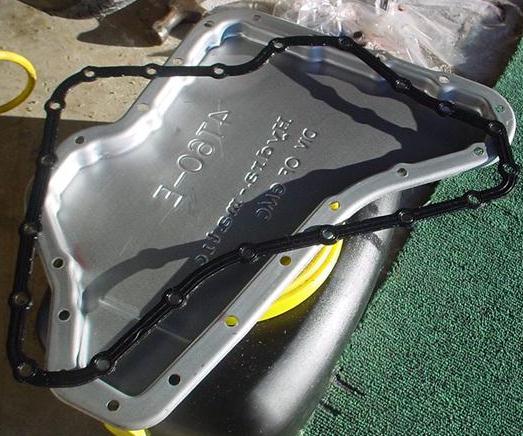
I use a variety of products, but Simple Green works well. Clean and wipe everything down, even the outside. Remove the magnet (little black square) and give it a super good cleaning as the shavings love to stick to it. Once it is all done, the whole thing should look almost new. Depending on the type of gasket you have you may have to spend some extra time removing bits of it. That being said, this car has a reusable gasket and yours may too. You can tell because 1)It's not cork. 2) It came off in one piece 3) It looks like the one below.
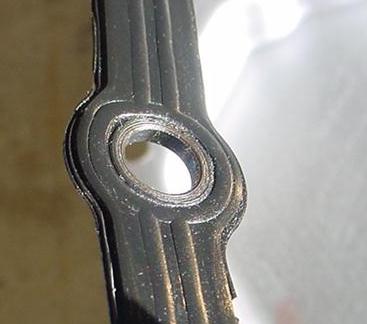
It has little metal grommets around each bolt hole and has little raised rubber sections along the entire gasket. If you remove it and it looks good, feel free to use it again. This is my 3rd transmission filter/fluid change and this gasket hasn't leaked on me yet. If your gasket is damaged or a non-reusable one, use the one that came with your filter. Below is the gasket and pan ready to go.
Now please note the picture above I haven't put the magnet back...I eventually did but it's very nice to have it in there, so try not to forget. There are two steps I don't have pictures for. The first is cleaning the transmission side of where the pan/gasket goes. Nothing special, just give it a good wipe and remove any gasket material that may be there. You'll need it to be nice and flat to make a good seal. Also, I cleaned all my transmission pan bolts...just clean them up in Simple Green so the threads and heads are clean. Next is installing the pan. Place the gasket on the pan and hold it up to the transmission. Start threading the bolts in and hand tighten them to set the pan against the transmission. I always tight the bolts in a crisscross pattern...you'll need them tight, but not superman tight, especially if you have a reusable gasket. The service manual states 13 lb-ft., which is actually girly-man tight.
Fill her up with about 5-1/2 quarts of transmission fluid. If you purchased a transmission conditioner, add it now. Get the transmission warm by driving it around a while and then check the level. Do this a couple times while you keep an eye out for leaks the next couple days. Then your set...enjoy the hopefully crisper shifts and the feeling that you did it yourself.
If you have any questions or comments, please feel free to contact me at TheReflex1@aol.com.